MS SQL database


You can use MS SQL Server on both smaller and larger networks.
First, open MS SQL Management Studio on our server, and after connecting to the SQL server select the server authentication mode you want to use (Windows Authentication mode or SQL Server and Windows Authentication mode). By right-clicking the Databases folder, create a new database called AIDA64. Then right-click on this database, and start a new query using the “DB – SQL Server.sql” schema located in the AIDA64 / SQL_Schema folder to create the required tables.
It is recommended to create a new user on the SQL Server. To do this, expand the Security folder and right-click Logins then select “New Login”. On the General page, add the user name, select SQL Server Authentication and type the password. Finally, select the newly created AIDA64 database as the Default database, select the Default language, then set the user privileges on the User Mapping page. Here, select the AIDA64 database and grant write (db_datawriter) and read (db_datareader) roles to it.
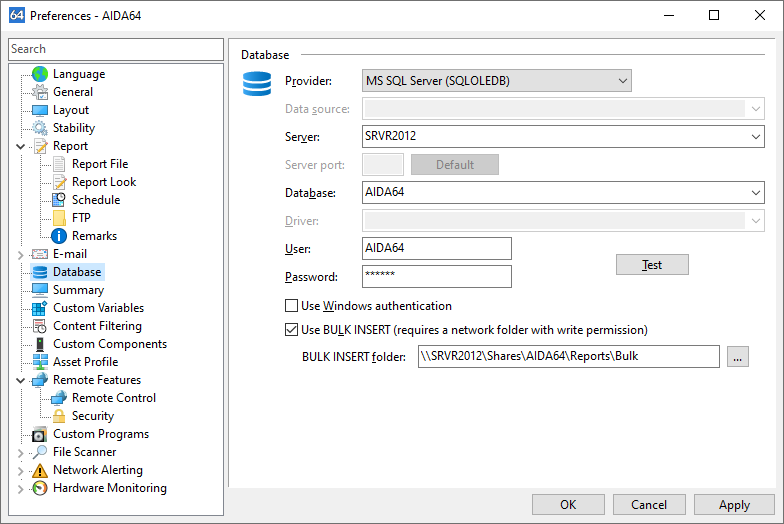
In the Preferences window in AIDA64, select the Provider “MS SQL Server”, add the server name and the authentication information (or select “Use Windows authentication”). If you have the appropriate privileges, you will be able to select our newly created AIDA64 database in the Database field.
If you want to use the “BULK INSERT” function, you need to add the “bulkadmin” role to the database on the “Server Roles” page in SQL Server Management Studio. This can accelerate the process of inserting new records to the MS SQL Server database. This feature requires a shared network folder with write permission for all users.

Firewall Settings
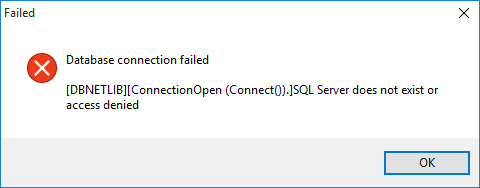
If you get a warning message on the client computer saying that the PCs cannot connect to the server, or there are problems with the connection, you need to run the following command on the SQL Server. This will open port 1433:
netsh advfirewall firewall add rule name="SQL Server" dir=in action=allow protocol=TCP localport=1433
