How to create reports of any PCs?


We can use AIDA64 Network Audit and Business to create reports of corporate computers – for example, laptops – even if they are not connected to the local network. This way, we can add those devices to the company PC inventory that are mostly used outside the office.
If you have a Domain Controller, please read this guide.
We have three options to inventory such computers:
- Just like on computers on the local network, we can configure a database to be used on laptops, too. The machines will connect to the database through the internet.
- We can use an FTP server, to which we can instantly upload our reports saved to CSV files.
- We can send the report files in email. With a script, we can automatically download the email attachments to a selected folder, or we can import them into a database.
If we save the reports of computers outside the company network to a file, and we want to add these reports to our main PC inventory database, we must make sure to save the reports in CSV format.
Database
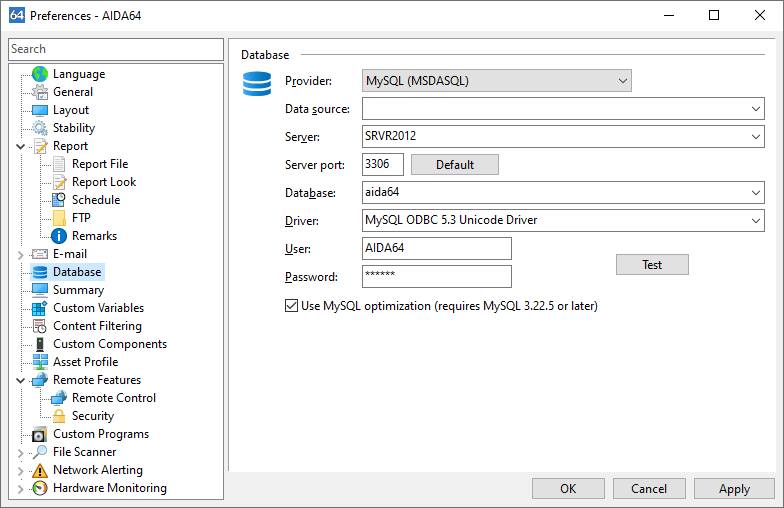
First, we should configure the database we want to use on the local network. After checking that the settings work as expected, we have to open the appropriate port on the hardware firewall. This is port 3306 for MySQL.
To learn more about how to configure the database, click here.
FTP Server
FTP server settings
After setting up the FTP server, we need to create a user. It is the “Home” directory of this user, for example: “D:\FTP\Reports”, into which AIDA64 will upload the reports.
We need to grant “Write” and “+ Subdirs” permissions to the user.
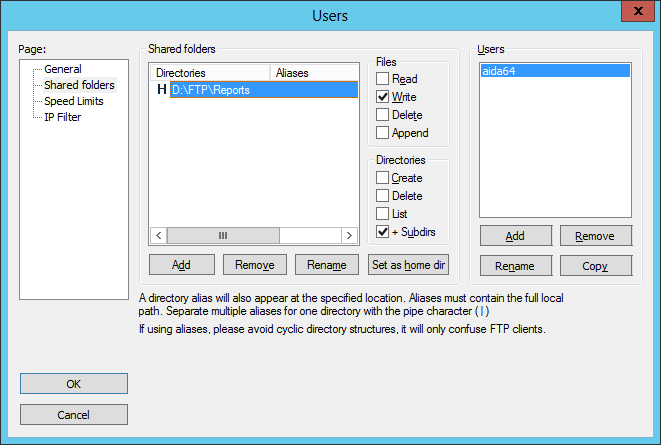
We have to open the port we use – in this case, port 21 – on the hardware firewall as well as on the local firewall, if required, so that our portable computers can connect to the FTP server from outside the network.
Configuring AIDA64
To configure FTP, we need to navigate to File / Preferences / Report / FTP.
We have to type our public IP address in the “Server” field, specify the FTP port we use, then provide the user name and password of the user we have created for the purpose. We should create a new folder within the “Home” directory – for example, “CSV files” –, and add that as the FTP folder here. If required, we can use passive mode.
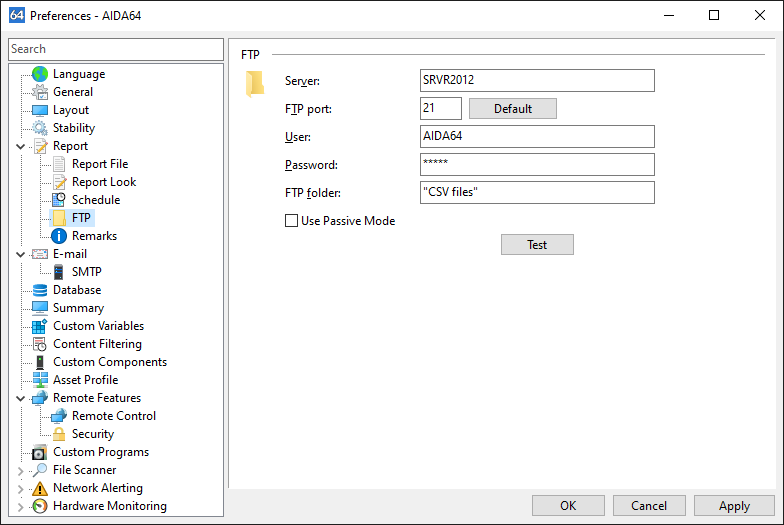
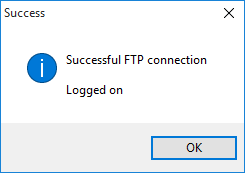
By clicking the “Test” button, we can check if our settings work as expected.
Running AIDA64
To make AIDA64 send reports automatically to the FTP server we need to use the /FTPUPLOAD [file name] command-line option.
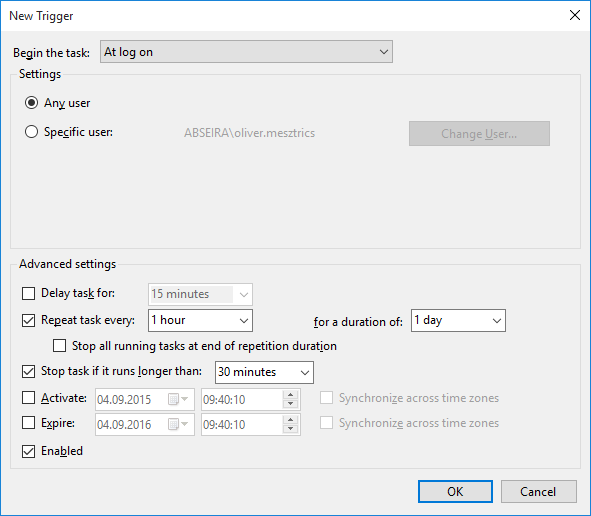
We can run the command as a scheduled task so that the software generates a report each time the user logs in, or just once a day. Open Task Scheduler, then locate Actions / Create task. On the Trigger tab, click “New” and create a new trigger.
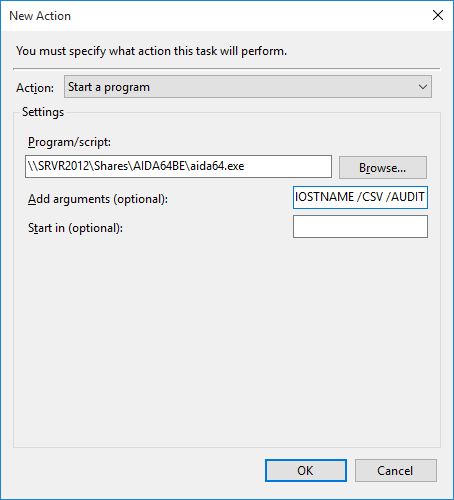
In the Program/Script field on the New action tab, we need to browse to the AIDA64 executable found in the share, and add the required command-line options. For example: “\\SRVR2012\Shares\AIDA64\aida64.exe /FTPUPLOAD $DATE_$HOSTNAME /CSV /AUDIT”.
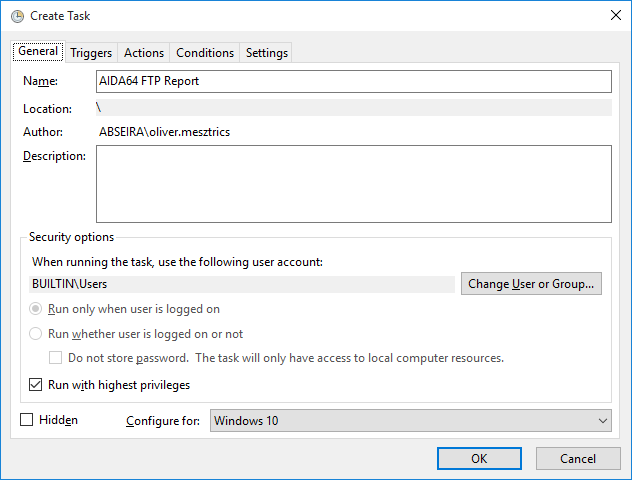
Finally, check the “Run with highest privileges” checkbox.
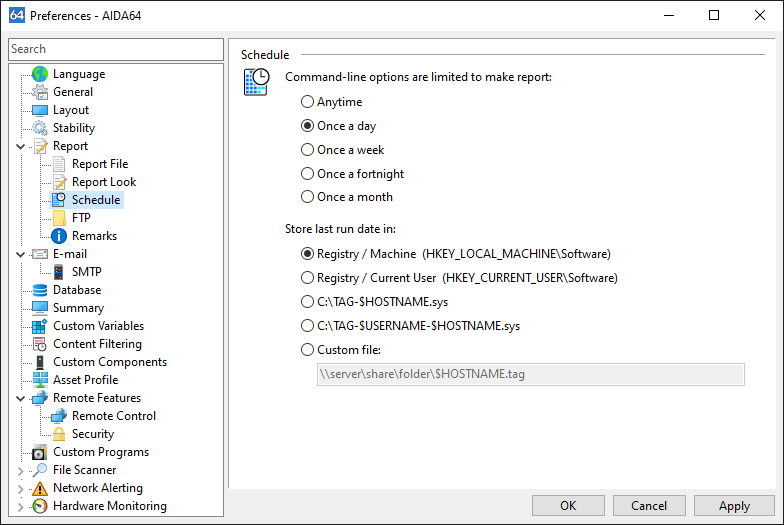
After we have created the new task, a report will be created each time the computer starts. In order to avoid creating a large number of unnecessary reports, we have to configure scheduling in AIDA64. We have to make sure that the “recur” settings in Task Scheduler are in line with our AIDA64 settings.
The reports created this way can be automatically imported into a database, if needed.
Please note that when running AIDA64 with such parameters, we cannot use /ACCEPT.
If we choose to send the reports in email, we need to run AIDA64 using the command-line option /E. When no address is specified in the command-line, the report is sent to the “To:” address provided on the email settings page, which is available in Preferences | E-mail. Reports are automatically compressed if compression is enabled in Preferences | Report. If we use this option on several computers, creating a dedicated email account is recommended.
For example, we can run AIDA64 with the following command:
aida64.exe /E admin@company.com /CSV /AUDIT /SILENT /SAFE
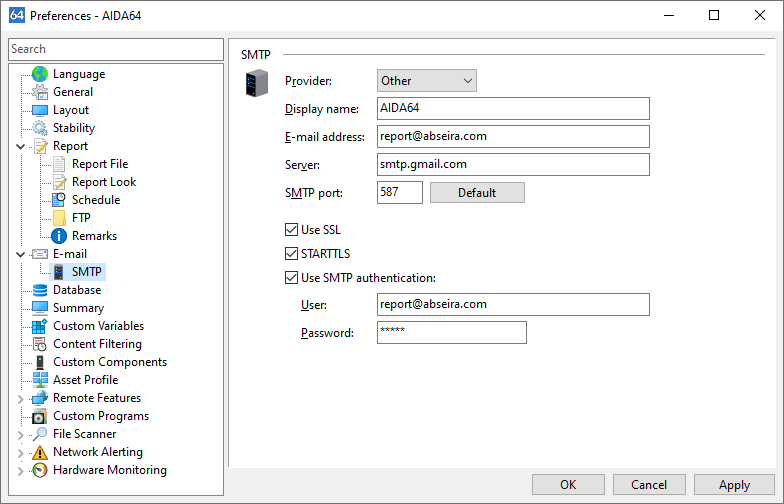
In this case, AIDA64 will instantly send the generated report to the specified email address.
This is how the email message the software sends looks like:
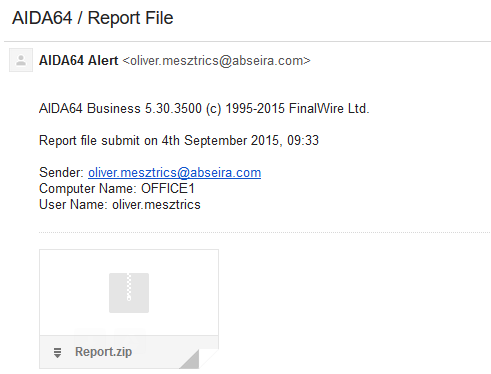
By clicking the download button, we can save the reports into a folder of our choice, from where they can be imported automatically into a database.